Ankle Sprain Recovery


What is an ankle sprain?
An ankle sprain occurs when ligaments that support the ankle become overstretched or torn. This can happen when you are landing or accepting weight onto your foot while rapidly changing positions and the weight of your body is not equally distributed over your foot. This may happen while playing sports, stepping off a curb wrong, or even walking on an uneven surface. The most common injury is when the foot turns inward and the ankle rolls outward which stresses the ligaments on the outside of the ankle. Not as common, the foot will turn outward while the ankle rolls inward and the ligaments on the inside of the ankle become stressed.
Risk Factors
The biggest risk factor of an ankle sprain is a history of a previous ankle sprain. Other risk factors include your foot anatomy (how your foot is shaped), your height, and your weight. These risk factors are intrinsic, meaning that you do not have much control over them. Extrinsic risk factors are things that can be changed and these include: type and duration of activity, taping, bracing, and shoe type.
Levels of Ankle Sprains
Ankle sprains are classified on a graded scale. A Grade I ankle sprain or mild sprain occurs with slight stretching and microscopic tearing of the ligaments. You will have some mild tenderness and swelling of the ankle. A Grade II sprain or moderate sprain occurs when there is partial tearing of the ligament with moderate tenderness and swelling. The joint will have increased mobility or instability with the grade. A Grade III ankle sprain occurs with a complete tear of the ligament with significant tenderness and swelling of the ankle. The ankle will have a significant level of instability.
Ankle Sprain Early Recovery
The recovery of an ankle sprain is dependent on the grade of the sprain and levels of your activity. A higher grade sprain takes longer to heal than a lower grade. For the first few days following an ankle sprain (days 0-4 following the injury), follow these ankle pain relief exercises and remember PRICE.
- Protect – protect the ankle from future injury, avoid activities that increase pain, consider wearing an ankle brace
- Rest – allow the ankle to heal by resting the ankle, crutches may be a good idea to avoid further stress on the ankle
- Ice – ice the ankle for 15-20 minutes 2-3x per day
- Compress – use an ace bandage to add compression to the ankle to help control swelling
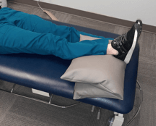
- Elevate – elevate the ankle above your heart, especially when icing. Avoid positions where the foot is in a dependent position as this will cause increased swelling.
Ankle Sprain Mid-Recovery
The goal of this phase is to further decrease swelling, increase mobility, and increase function of the ankle while continuing to manage pain and swelling. This phase is dependent on the grade and severity of the sprain, but typically follow these foot ankle exercises for pain during days 4-10.
- Ankle pumps – Pump the ankle up and down like you are hitting a gas pedal. Repeat 20x, 3x per day.


- Ankle ABC’s – Use your big toe to write the alphabet, first in lower case, then again in upper case

- Taping/bracing – use taping or a brace to help give support to the ankle as you start to increase the weight placed on the foot.
- See the last page for instructions in how to self-tape
Ankle Sprain Late-Recovery
The goal of this phase is to increase strength and stability at the joint as you start to return to your normal activities. Continue to avoid activities that increase your ankle pain or dynamic exercises that put a lot of strain on the ankle including running and jumping. This phase typically occurs during days 10-21 following injury. Perform these ankle pain exercises during this phase.
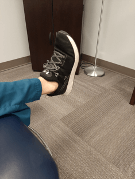
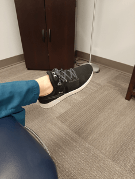
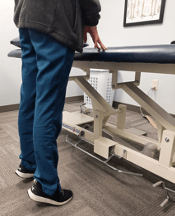
- Single leg balance – stand on one leg for 30 seconds, working up to tolerance of being able to do this for one minute. This helps to strengthen the muscles that provide support to the ankle and feet.
- Calf raises – raise up onto your toes and lower back down slowly.
- Ankle 4-way with band – use an ankle band to strengthen the muscles that help the ankle move in all 4 directions

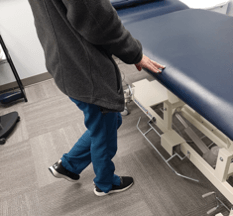
- Normal walking pattern – focus on walking without a limp. Practice landing with your heel and pushing off with your toes.
Ankle Sprain Full-Recovery
The goal of this phase is to return to full activities that you were performing before the injury. This is when you can start loading the joint again. Remember that one of the risk factors of an ankle sprain is a previous injury to the ankle. So, if you participate in highly dynamic activities that include running, jumping, or cutting, it may be a good idea to continue to wear a brace or utilize taping for additional support. Return to sport should be slow and cautious to reduce risk of re-injury. You should be able to perform an activity without pain, before you progress the activity. This phase typically starts around day 21, if pain levels and swelling in the ankle are minimal.
- For example, walk pain-free before jogging. Jog pain-free before running/sprinting.
- Practice landing off a step, balanced on both feet (pain-free) before you start jumping. Be able to jump off both feet (pain-free) before jumping/landing on one foot, etc.
If you are having significant pain levels, pain to the touch of your ankle bones, or having difficulty walking more than 4 steps, it may be a good idea to contact a healthcare provider for an x-ray to rule out an ankle fracture.
Self Taping for the Ankle Using Rock Tape
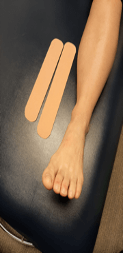
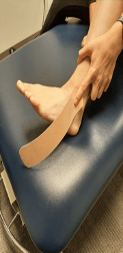
- Cut two pieces of rocktape and round the edges
- Start by placing the edge of the first tape in front of the ankle bone on the outside of the ankle. Avoid touching the tape as it decreases the ability of the tape to stick. Remove only a small portion of the back of the tape as you apply the first step and then remove the rest of the back as you apply the tape to the rest of the foot.

- Place the tape on 75% stretch as you come underneath the foot.
- As you bring the tape under the foot, aim for the tape to go behind the ankle bone on the inside of the ankle


- Smooth out the piece of tape and apply rub over the tape, as the heat/friction helps the tape to stick
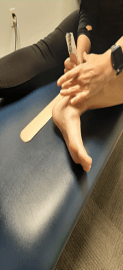
- The next piece of tape starts behind the ankle bone on the outside of the ankle


- Pull the tape under your foot at 50% stretch
- As you come underneath the foot, aim the tape to cross in front of the ankle bone on the inside and back towards the outside of the leg

- Rub over the tape, as friction/heat helps the tape stick
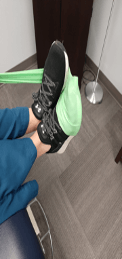
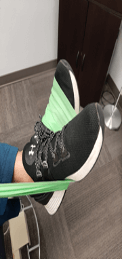
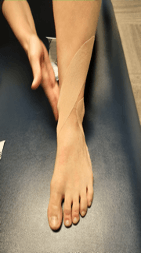
- The finished tape should look like the above pictures from the front and side.
For more on ankle pain relief, reach out to ProTailored Physical Therapy or call us at (260) 739-0300.